

maya.cmds)PyQt5/PySide2)MELstring $win = `window "Simple Window"`;
showWindow $win;
maya.cmdfrom maya import cmds
win = cmds.window(title = "Simple Window",widthHeight = (300,200))
cmds.showWindow(win)
OpenMaya API & PySide2from PySide2 import QtCore, QtWidgets
from shiboken2 import wrapInstance
import maya.OpenMayaUI as omui
def mayaWindow():
main_window_ptr = omui.MQtUtil.mainWindow()
return wrapInstance(long(main_window_ptr),QtWidgets.QWidget)
class TestWindow(QtWidgets.QDialog):
def __init__(self,parent=mayaWindow()):
super(TestWindow,self).__init__(parent)
self.setWindowTitle("Test Dialog")
self.resize(400, 250)
# make sure the window is overlay the maya
self.setWindowFlags(self.windowFlags() | QtCore.Qt.WindowStaysOnTopHint)
# make sure the code will only run when this is the main file
if __name__=="__main__":
d = TestWindow()
d.show()
from PySide2 import QtCore, QtWidgets
from shiboken2 import wrapInstance

import maya.OpenMayaUI as omui

from maya import cmds


def getDock(name='TestWorkspace'):
    deleteDock(name) # firstly, delete the Dock
    # Create a tab window(dock) in maya
    ctrl = cmds.workspaceControl(name,label = "Window Test")

    qtCtrl = omui.MQtUtil_findControl(ctrl)
    ptr = wrapInstance(long(qtCtrl),QtWidgets.QWidget)
    return ptr

def deleteDock(name = "LightingManagerDock"):
    if cmds.workspaceControl(name,query = True, exists = True):
        cmds.deleteUI(name)


# Run function to get the window
getDock()
maya.cmds)from maya import cmds
def buttonAction(args):
print("Button is pressed")
def showUI():
win = cmds.window(title="Button Event", widthHeight = (200,200))
cmds.columnLayout()
cmds.button(label="My Button", command = buttonAction)
cmds.showWindow(win)
showUI()
Sometimes we also need to grab input from field controls, in both integet and float varieties.
The below script is to create spheres by grabing the input field.
class SpheresClass():
  def __init__(self):
    self.win = cmds.window(title="Make Spheres",widthHeight=(300,200))
    cmds.columnLayout()
    self.numSpheres = cmds.intField(minValue=1)
    cmds.button(label="Make Spheres",command = self.makeSpheres)
    cmds.showWindow(self.win)
  def makeSpheres(self,*args):
    number = cmds.intField(self.numSpheres,query=True,value=True)
    for i in range(0,number):
      cmds.polySphere()
      cmds.move(i*2.2,0,0)

SpheresClass()
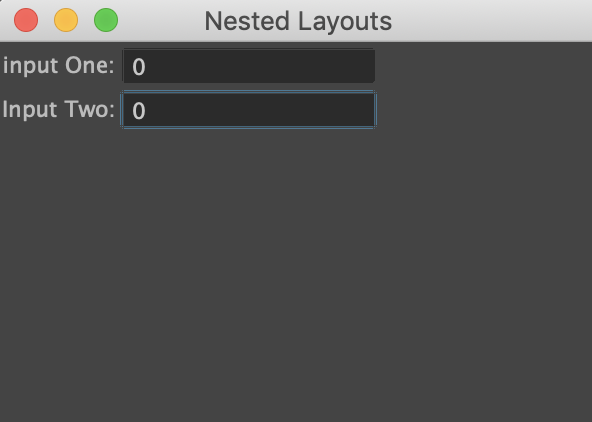
Many times, we will want to create organized UI Layout, we need to nest layouts inside each other.
The following example shows using rowLayouts within a single columnLayout to add label before the input field.
from maya import cmds

class NestedLayouts():
  def __init__(self):
    self.win = cmds.window(title="Nested Layouts", widthHeight=(300,200))
    cmds.columnLayout()
    cmds.rowLayout(numberOfColumns=2)
    cmds.text(label="input One:")
    self.inputOne = cmds.intField()

    # in order to continue to add out UI, we have you use `cmds.setParent("..")`
    # to back to the previous layout, which is the column layout
    cmds.setParent("..")
    cmds.rowLayout(numberOfColumns=2)
    cmds.text(label="Input Two:")
    self.inputTwo = cmds.intField()
    cmds.setParent("..")
    cmds.showWindow(self.win)

NestedLayouts()
from maya import cmds

class TabExample():
  def __init__(self):
    self.win = cmds.window(title = "Tabbed Layout",widthHeight = (300,300))
    self.tabs = cmds.tabLayout()

    # add first tab
    firstTab = cmds.columnLayout()
    cmds.tabLayout(self.tabs,edit=True,tabLabel=[firstTab,'Simple Tab'])
    cmds.button(label="Button")
    cmds.setParent("..")

    # add the second tab, and setup scrolling
    scroll = cmds.scrollLayout()
    cmds.tabLayout(self.tabs,edit=True,tabLabel=[scroll,'Scrolling Tab'])
    cmds.columnLayout()
    for i in range(20):
      cmds.button(label='Button '+str(i+1))
    cmds.setParent("..")
    cmds.setParent("..")
    cmds.showWindow(self.win)
TabExample()
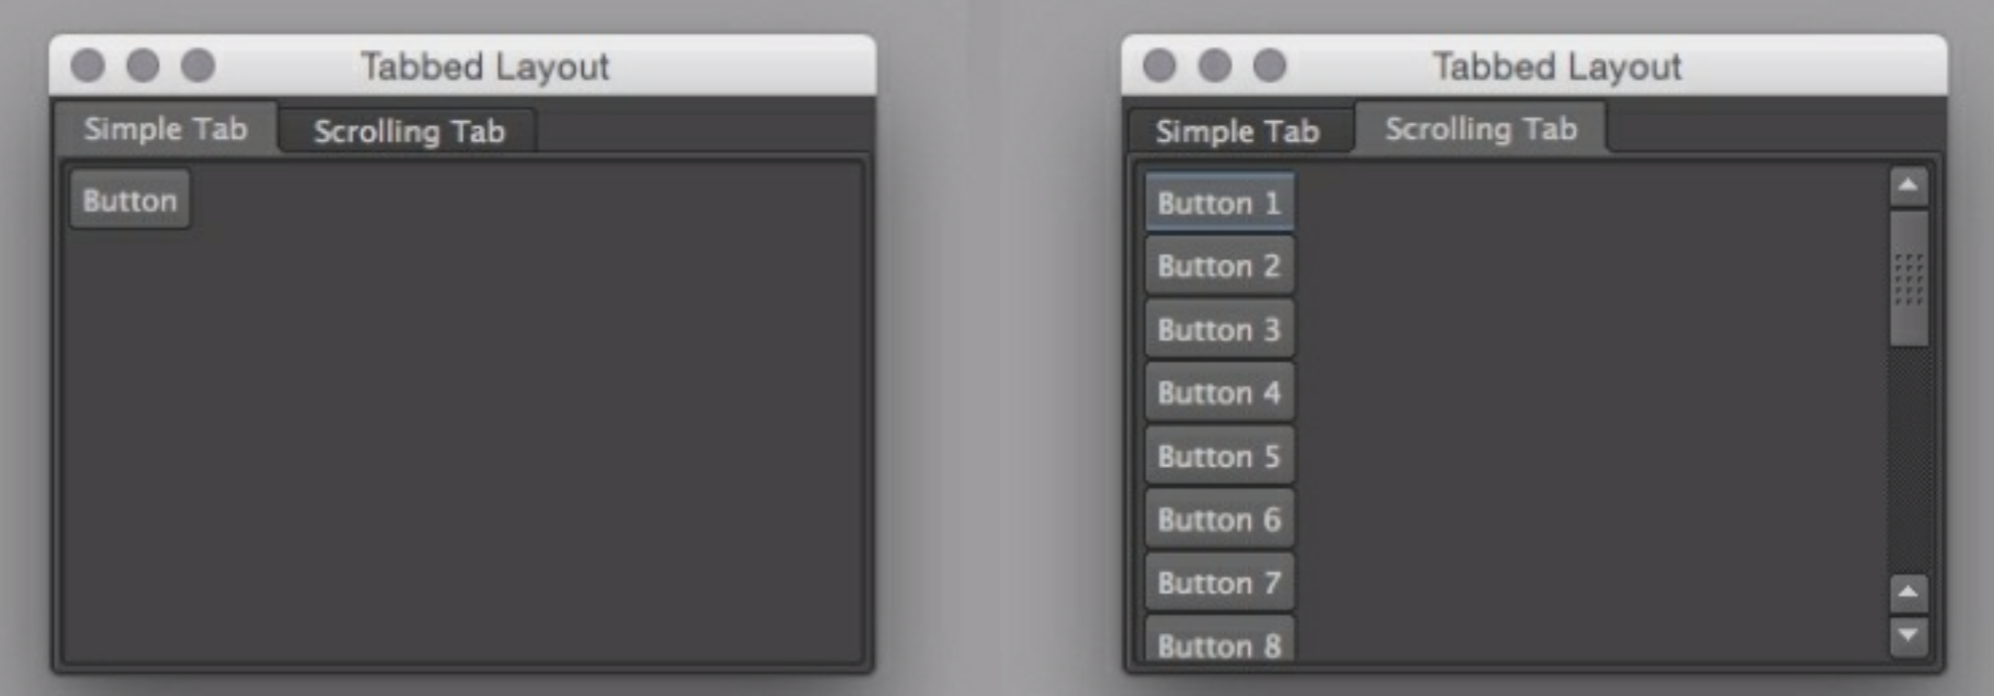
selectTabIndexcan help you get the info of the currently selected tab
currTab = cmds.tabLayout(self.tabs,query=True,selectTabIndex = True)Use selectTabIndex to set which tab is currently actice
cmds.tabLayout(self.tabs,edit = True,selectTabIndex=2)

from maya import cmds

class CustomMenu:
  def __init__(self):
    self.win = cmds.window(title="Menu Example", menuBar = True, widthHeight =(300,200))
    fileMenu = cmds.menu(label ="File")
    loadOption = cmds.menuItem(label="Load")
    saveOption = cmds.menuItem(label="Save")
    cmds.setParent("..")

    objectsMenu = cmds.menu(label="Objects")
    sphereMI = cmds.menuItem(label="Make Sphere", command = self.sphereCommand)
    sphereOption = cmds.menuItem(optionBox = True,command = self.sphereCommandOptions)
    cubeOption = cmds.menuItem(label = "Make Cube",command = "cmds.headsUpMessage('Lets make cube')")
    cmds.setParent("..")

    cmds.columnLayout()
    cmds.text(label = "Put the rest of yout interface here")

    cmds.showWindow(self.win)

  def sphereCommand(self,*args):
    self.makeSphere(1)
  def sphereCommandOptions(self,*args):
    promptInput = cmds.promptDialog(title = "SphereRadius",message="Specify Radius: ", button=['OK','CANCEL'], defaultButton = 'OK',cancelButton = 'CANCEL',dismissString='CANCEL')

    if(promptInput == 'OK'):
      radiusInput = cmds.promptDialog(query=True,text=True)
      self.makeSphere(radiusInput)

  def makeSphere(self,r):
    cmds.polySphere(radius = r)
  def makeCube(self,*args):
    cmds.polyCube()

CustomMenu()
PyQt5/PySide2)from PySide2 import QtCore, QtWidgets
from shiboken2 import wrapInstance
import maya.OpenMayaUI as omui
def mayaWindow():
main_window_ptr = omui.MQtUtil.mainWindow()
return wrapInstance(long(main_window_ptr),QtWidgets.QWidget)
class TestWindow(QtWidgets.QDialog):
def __init__(self,parent=mayaWindow()):
super(TestWindow,self).__init__(parent)
self.setWindowTitle("Test Dialog")
self.resize(400, 250)
# make sure the window is overlay the maya
self.setWindowFlags(self.windowFlags() | QtCore.Qt.WindowStaysOnTopHint)
self.buildUI()
def buildUI(self):
btn = QtWidgets.QPushButton("Test Button",self)
btn.clicked.connect(self.buttonAction)
def buttonAction(args):
print("Test Btn")
# make sure the code will only run when this is the main file
if __name__=="__main__":
d = TestWindow()
d.show()
End –Cheng Gu